

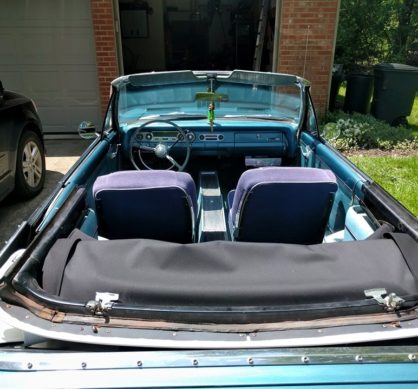
The original seat and belt were in a sorry state
When I first purchased the 1966 F100, David called it the “Meatrocket” owing to the fact that it had a set of 50 year old nonfunctional lap belts, and in a frontal collision the driver would rocket through the windshield like a piece of meat. A 3-point seatbelt retrofit would be just the ticket to increase the safety margin with the stock 4-wheel drum brakes. Due to the sad state of the original bench seat, I also decided a seat upgrade was in order. As an added bonus, choosing a seat with head rests improves the occupant safety in case the truck is rear-ended.
Research on Google indicated that by swapping the seat tracks, I could use any seat up to the 1996 F150. I tracked down a color matched vinyl bench with integrated head rests out of the 1992-1996 generation F150, a $75 Craiglist score.
The seat belts were another matter. I located a site that builds custom seat belts and supplies the necessary retrofit hardware, and purchased a set of retracting 3-point belts with period appearing latch buckles.
Installing the seat was a relatively straightforward process, involving plenty of liquid wrench and colorful language to remove the old seat. Next, the seat tracks are unbolted from both seats, and since the track width is the same, the original track bolts right up to the later model seat. Finally, the new seat on original track bolts straight back into the truck.

The finished seat and belt upgrade.
The seat belt retrofit required a bit more work. The bottom mount points are already in the truck, but the shoulder mount doesn’t exist. Luckily the inner cab corners are ribbed for extra strength, and serve as a great location to attach the shoulder mount using these retrofit brackets. Each inner cab corner is drilled out, being careful not to dent the outer sheet metal when the drill breaks through, and the brackets can be riveted in place before the shoulder mounts are bolted up. In order to avoid drilling extra holes in my truck, I chose to skip the rivets and simply hold the brackets in place from behind while bolting the seat belt in place.
Mounting the latches in the existing inner bolt locations and the retractors in the outer mount locations completes the seat belt installation, and the finished product is satisfactory indeed.
These two upgrades improve the looks inside the cab, as well as the safety. Now, with luck, my head won’t be going through either window in the event of a crash.


dvd 通販
Thẳng Soccer Việt Nam Vs Lebanon. Xem Truc Tiep Bong Da. Futsal Việt Namlogo k+Xem bóng đá trực tuyến Trực tiếp Odd BK vs Sarpsborg, 20h ngày 24/5, giải VĐQG Na Uy. Xem lịch phạt sóng trực tiếp soccer EURO ngày hôm nay được Webthethao cập nhật chính xác nhất.
真田丸 dvd 完全版
麒麟がくる 通販
seungri
north koreakim jong un